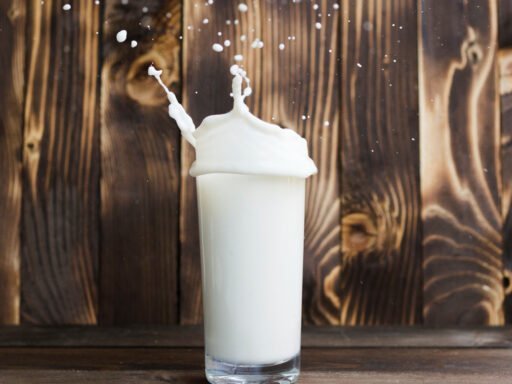
How to make butter from raw milk? Butter is a fundamental ingredient in many cuisines. Its rich, creamy texture and versatile nature make it a favorite for cooking, baking, and spreading on bread. But have you ever wondered how to make butter from raw milk at home? This guide will walk you through the process, ensuring that you can enjoy fresh, homemade butter made from raw milk.
Table of Contents
- What You Need to Get Started
- Tips for Success
- Why Make Butter from Raw Milk?
- Conclusion
- FAQ: How to Make Butter from Raw Milk
- 1. Can I use pasteurized milk to make butter?
- 2. How much cream do I need to make butter?
- 3. How long does the churning process take?
- 4. What is the best temperature for churning cream?
- 5. Why is it necessary to wash the butter?
- 6. Can I add flavors to my homemade butter?
- 7. How should I store homemade butter?
- 8. What can I do with the leftover buttermilk?
- 9. Is it necessary to add salt to the butter?
- 10. Can I make butter without a butter churn?
- 11. How do I know when the butter is ready?
- 12. Can I use non-dairy milk to make butter?
- 13. How Long Does It Take to Make Butter?
- 14. Is It Necessary to Add Salt?
What You Need to Get Started
Before diving into the steps on how to make butter from raw milk, it’s essential to gather all necessary ingredients and tools. Here’s what you’ll need:
- Raw Milk: Preferably fresh and organic.
- A Large Bowl: To collect the cream.
- A Butter Churn or Mixer: For churning the cream.
- Ice-Cold Water: To wash the butter.
- Salt (Optional): For seasoning.
Step 1: Collecting the Cream
The first step in how to make butter from raw milk is collecting the cream. Raw milk separates naturally into cream and milk. Follow these steps to collect the cream:
- Refrigerate the Raw Milk: Let the raw milk sit in the refrigerator for at least 24 hours to rise the cream to the top.
- Skim the Cream: Use a ladle or spoon to carefully skim the cream from the top of the milk. Collect it in a separate container.
A L S O R E A D
What side should I sleep on with a ruptured eardrum? Sleeping Nightmare
Step 2: Churning the Cream
Now that you have collected the cream, it’s time to churn it. This is a crucial step in how to make butter from raw milk.
- Pour the Cream into a Butter Churn or Mixer: If using a traditional butter churn, fill it about one-third full to leave enough space for the cream to move. To avoid splashing, use a mixer bowl that’s spacious enough.
- Start Churning: Begin the churning process. Begin mixing at a low speed and gradually accelerate. As you mix, the cream will thicken and eventually separate into butter and buttermilk.
- Watch for the Break: The cream will turn into whipped cream consistency first. Continue churning until it breaks into solid butter and liquid buttermilk.
Step 3: Washing the Butter
Washing the butter is an essential step in how to make butter from raw milk, as it removes any remaining buttermilk, which can cause the butter to spoil faster.
- Drain the Buttermilk: Pour off the buttermilk and save it for other recipes, like pancakes or biscuits.
- Wash the Butter: Transfer the butter to a bowl of ice-cold water. Knead the butter with a spatula or your hands to wash out any remaining buttermilk. Repeat this process several times with fresh cold water until the water runs clear.
Step 4: Seasoning and Storing
Once the butter is clean, you can season it if desired and prepare it for storage.
- Add Salt (Optional): If you prefer salted butter, add a pinch of salt and knead it into the butter until evenly distributed.
- Shape the Butter: Form the butter into a ball or block. You can also use butter molds for a decorative touch.
- Store Properly: Store the butter in an airtight container. It can be stored in the refrigerator for up to two weeks or in the freezer for longer preservation.

Tips for Success
Here are some additional tips to ensure success when learning how to make butter from raw milk:
- Use Fresh, High-Quality Raw Milk: The quality of the milk directly affects the taste and texture of the butter.
- Keep Everything Cold: Churning and washing the butter in a cool environment helps maintain its texture.
- Be Patient: The churning process can take time, especially if doing it by hand.
Why Make Butter from Raw Milk?
Understanding how to make butter from raw milk is not just about the process; it’s about the benefits and enjoyment it brings. Here are a few reasons why you might want to make your own butter:
Health Benefits
Butter made from raw milk contains beneficial bacteria and enzymes that are often lost in commercially processed butter. These can aid in digestion and provide other health benefits.
Flavor and Quality
Homemade butter from raw milk has a richer flavor and creamier texture compared to store-bought versions. Its taste is improved by its freshness and lack of preservatives.
Cost-Effective
Making butter at home can be more economical, especially if you have access to fresh raw milk. You also get buttermilk as a by-product, which can be used in various recipes.
Environmental Impact
By making your own butter, you can reduce packaging waste and support sustainable farming practices, especially if you source your raw milk from local farms.
Conclusion
Learning how to make butter from raw milk is a rewarding and straightforward process. Not only do you get to enjoy the superior taste and quality of homemade butter, but you also gain a deeper appreciation for the traditional methods of food preparation. Whether you’re a seasoned cook or a beginner, this guide provides all the information you need to successfully make your own butter at home. So, gather your ingredients and tools, and start churning your way to delicious, homemade butter!
FAQ: How to Make Butter from Raw Milk
1. Can I use pasteurized milk to make butter?
Absolutely, you can use pasteurized milk to make butter. However, the flavor and nutritional benefits may not be as pronounced as those from raw milk. Raw milk butter tends to have a richer taste and contains beneficial bacteria and enzymes.
2. How much cream do I need to make butter?
Typically, you need about 1 quart (4 cups) of cream to produce approximately 1 pound of butter. The exact yield can vary depending on the milk’s fat content.
3. How long does the churning process take?
Churning typically takes between 15 and 30 minutes. This time can vary based on the method used (hand-churning, mixer, or food processor) and the amount of cream being churned.
4. What is the best temperature for churning cream?
The cream should be at a cool temperature, around 50-60°F (10-15°C). If the cream is too warm, it may not churn properly. Keeping the cream cool helps ensure a smooth churning process.
5. Why is it necessary to wash the butter?
Washing the butter helps remove any remaining buttermilk, which can cause the butter to spoil more quickly. Rinsing with ice-cold water until the water runs clear ensures that your butter will stay fresh longer.
6. Can I add flavors to my homemade butter?
Feel free to experiment with different flavors in your homemade butter. Popular additions include fresh herbs, garlic, honey, or spices. Simply mix these ingredients into the butter after the washing process.
7. How should I store homemade butter?
Store your homemade butter in an airtight container. The butter has a shelf life of two weeks when refrigerated. For longer storage, you can freeze the butter for up to six months. Make sure to label and date the container for reference.
8. What can I do with the leftover buttermilk?
The leftover buttermilk is perfect for baking and cooking. Use it in recipes for pancakes, biscuits, muffins, or as a marinade for meats. This versatile ingredient imparts a tangy taste and keeps dishes moist.
9. Is it necessary to add salt to the butter?
Adding salt is optional. Unsalted butter is great for baking and cooking, where precise control over salt content is needed. Salted butter is delicious for spreading on bread or adding flavor to dishes. If you choose to add salt, start with a small amount and adjust to taste.
10. Can I make butter without a butter churn?
Yes, you can make butter without a traditional butter churn. A stand mixer, hand mixer, or even a food processor can be used to churn the cream. For a more hands-on approach, you can also shake the cream in a mason jar until it separates into butter and buttermilk.
11. How do I know when the butter is ready?
As you churn the cream, it will initially thicken to a whipped cream consistency. Keep churning until the solid butterfat granules separate from the liquid buttermilk. You’ll see clumps of butter forming and liquid buttermilk separating. This is your indication that the butter is ready.
12. Can I use non-dairy milk to make butter?
Butter is traditionally made from dairy milk. Non-dairy alternatives, like coconut milk or nut milk, do not have the same fat content and structure needed to form butter in the same way. However, there are recipes for non-dairy spreads that mimic the texture of butter.
13. How Long Does It Take to Make Butter?
The time required can vary. The churning process alone typically takes around 15-30 minutes, depending on the method used and the amount of cream.
14. Is It Necessary to Add Salt?
Adding salt is optional. Unsalted butter is great for baking, while salted butter can be enjoyed on its own or used in savory dishes.


